Before you can start digging deep into how bots and spiders behave on your websites, you need to create an account with Log Hero and add the plugin to your site.
All you need to have is a Google account, access to Google Analytics and adding the plugin into the source code of your site. The process of setting up Log Hero is really simple and consists of the following steps:
- Creating a Log Hero account.
- Creating a new Google Analytics property.
- Selecting the right plan.
- Installing and activating the plugin.
This might seem a lot but the user flow is very straightforward and simple and will literally take less than four minutes. This article is a step by step tutorial on how to do set up Log Hero properly.
1. Creating a Log Hero account
The very first step is to create an account, which you can use to administer all the domains that you want to use Log Hero for. To make this easy, the Hero uses Google’s login feature. You can use any Google account, it doesn’t have to be a Gmail account.
Log Hero does not support multiple users yet. So, if you intend to share the account with your colleagues or friends, it makes sense to create a new email address that you can share.
To sign up for Log Hero, you go to log-hero.com and click on login at the top right corner of the header menu or click on the Log in with Google button here.
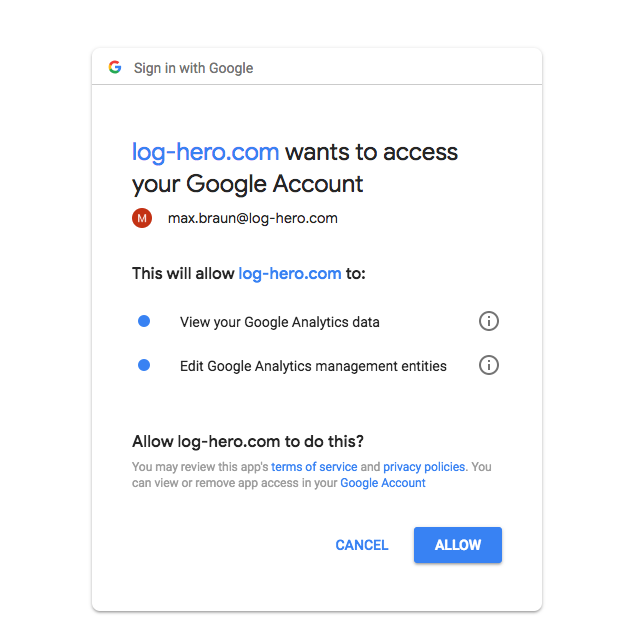
After you clicked on Sign in, you will be redirected to Google and asked whether you will give Log Hero access to the Google Analytics Management API.
Log Hero needs the access as without it he can’t create the new property nor can he create the custom dimensions that are necessary for you to recognize and understand the bots.
2. Creating an upload property
In the first step of the setup process, you create a new Google Analytics Property. It will contain all visitors to your website and all the bots and spiders that crawl it.
The Hero doesn’t add the bots and spiders to your existing GA account as we want to rule out any possibility of messing with your primary GA account.
To create the new property, you need to have edit permissions on the account level. Sometimes, you will see all accounts on the left greyed out, and you can’t select one. If this is the case, you have three options:
- Try and get edit permissions.
- Create a new GA account inside your Google account.
- Log into a different, existing Google account (click on change account).
We mimic GA’s user interface when you select the GA account selection on the very left:
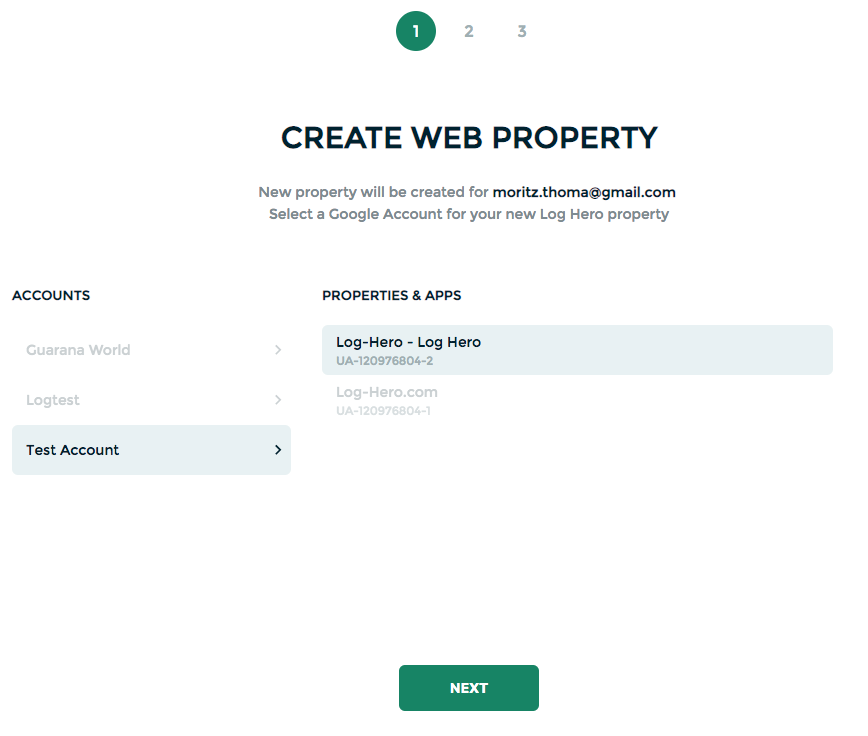
You can now name the new Property as you like. In our example, we named it Log-Hero. We’re not proud of our lack of creativity here. The good news is that this was pretty much the only thing you needed to do here.
Selecting a different Google account
If you didn’t log into the right Google account, you can click on the Change account link, next to your email address. Now you can log into Google with a new address and use its GA accounts instead.
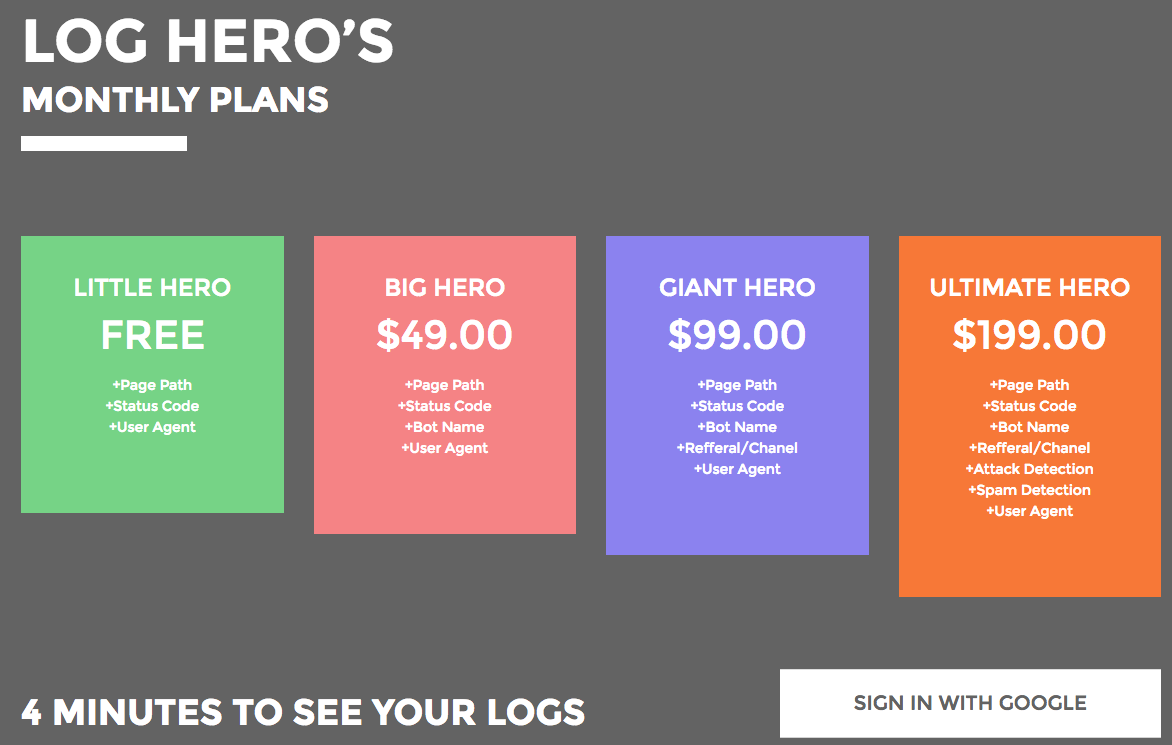
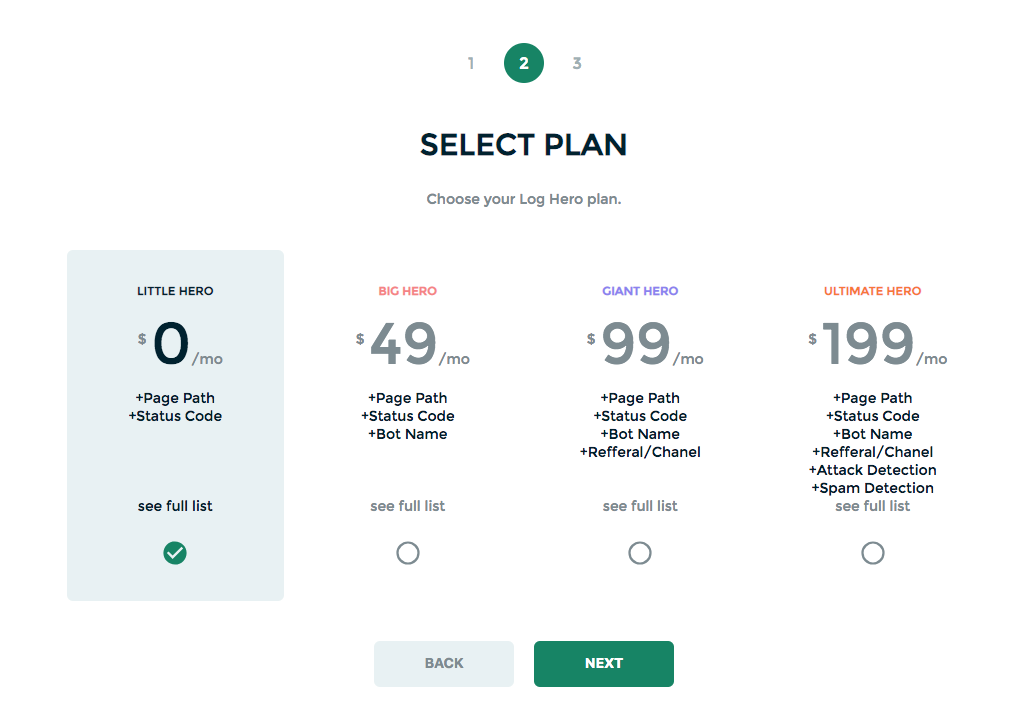
3. Selecting the right plan
Now that you have created the upload property, you need to select a plan. You can always start with the free plan and upgrade later, no problemo.
The difference between free and paying is always access to more data. While the free plan already is very powerful and helps you monitor how bots behave on your site, the paid plans offer advanced data points, that help you maximize the value of the logs.
4. Installing the plugin
You have created an account for Log Hero, great job!! On the last screen, you see the API token that you need to activate your Log Hero plugin. 
Now, you have to install the Log Hero plugin on your site. What plugin you need depends on your site’s source programming language. We have plugins for PHP, Apache, and WordPress.
We are constantly adding new integrations. If your website isn’t covered by our integrations, please vote for our next plugin here.
WordPress
To install our WordPress plugin, you can either go to Log Hero’s WordPress site or find the plugin from within your WordPress installation.
Download from WordPress.org
- Download the Log Hero Zip Folder.
- Upload the
log-herofolder to the/wp-content/plugins/directory. - Activate the Log Hero plugin through the ‘Plugins’ menu in WordPress.
- Enter the API token.
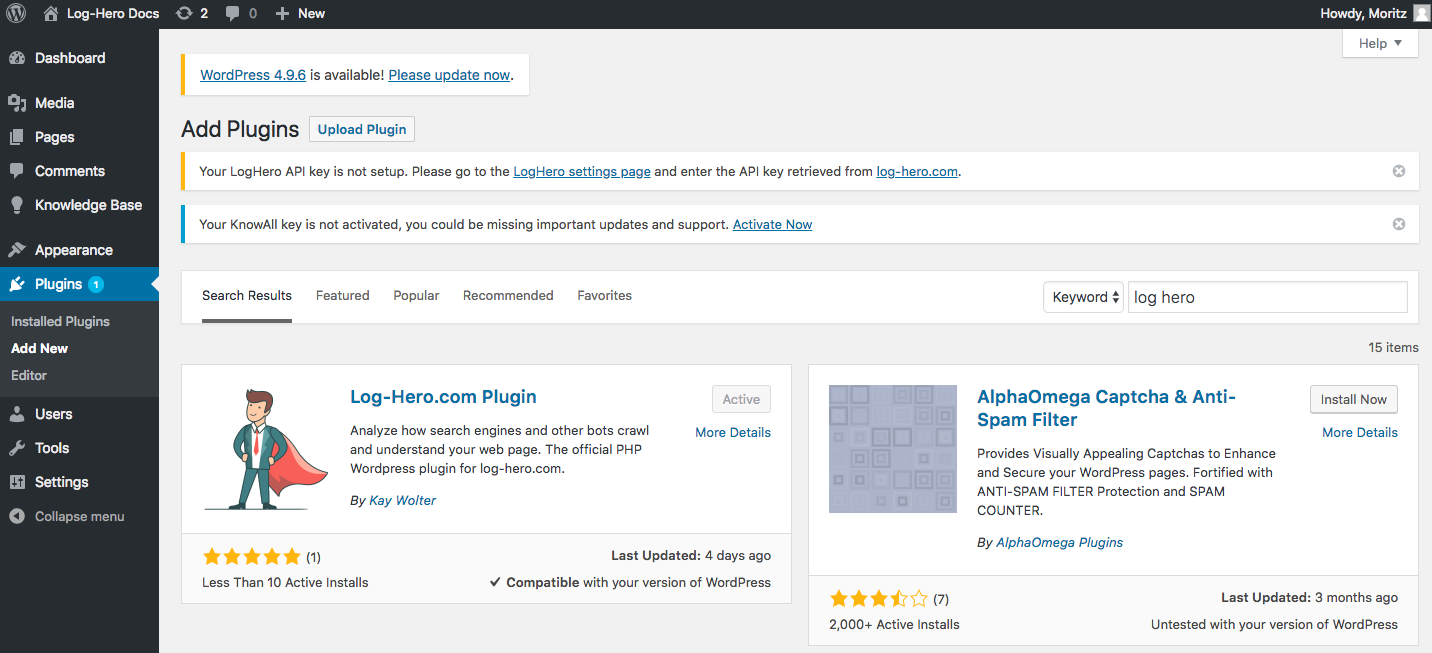
Search within your WordPress installation
- Go to ‘Plugins > Add New’.
- Search for ‘Log Hero’.
- Install and activate the Log Hero in your plugins page.
- Enter the API token.
Activating the WordPress plugin with the API token
Now that you have installed the plugin, you need to activate it in WordPress. To do that, go to your settings on the left bar of your WordPress admin interface and:
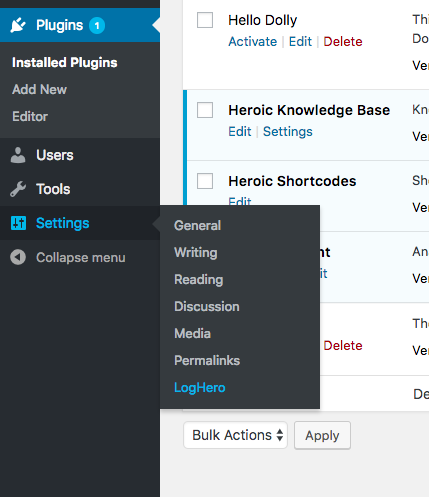
- Click on Settings > LogHero.
- Now you have to enter the API key you received in the third step of the sign-up flow on log-hero.com.
- You’re done! You should see the data coming into your Log Hero Google Analytics account.
Apache
For both our Apache plugin as well as the integration instructions, please write us here.
PHP
For both our PHP plugin as well as the integration instructions, please write us here.